Photography with Mobile Phone : How to do??
- Jun 25, 2020
- 4 min read

Before the days of smartphones -- if you can remember such a time -- taking a great photo was a labor-intensive process. You'd have buy a fancy camera and editing software for your desktop computer, and invest some serious time and energy into learning how to use them.
But, thanks to our mobile devices and the editing apps that come with them, we can now take high-quality photos and edit them without too many bells and whistles -- all from the same device that we use to make calls.
What's the secret to taking great pictures with your smartphone, then? As it turns out, there are a few of them. Check out these tips below to improve your smartphone photography game.
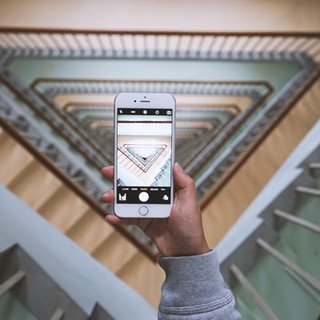
1. Use Grid lines to balance your shot.
One of the easiest and best ways to improve your mobile photos is to turn on the camera's grid lines. That superimposes a series of lines on the screen of your smartphone's camera that are based on the “rule of third” -- a photographic composition principle that says an image should be broken down into thirds, both horizontally and vertically, so you have nine parts in total.
According to this theory, if you place points of interest in these intersections or along the lines, your photo will be more balanced, level, and allow viewers to interact with it more naturally.
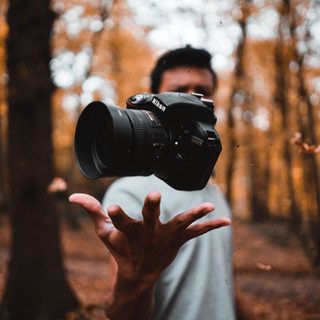
2. Set your camera's focus.
Today's phone cameras automatically focus on the foreground of your frame, but not every picture you take on your phone has an obvious subject. To adjust where you want your camera lens to focus, open your camera app and tap the screen where you want to sharpen the view.
If you're taking a photo of something in motion, for example, it can be difficult for your camera to follow this subject and refocus as needed. Tap the screen to correct your phone camera's focus just before snapping the picture to ensure the moving subject has as much focus as possible. A square or circular icon should then appear on your camera screen, shifting the focus of your shot to all of the content inside that icon.
3. Embrace negative space.
"Negative space" simply refers to the areas around and between the subjects of an image --and it can take a photo from "good" to "great."
When you include a lot of empty space in a photo, your subject will stand out more and evoke a stronger reaction from your viewer. And what does negative space looks like? It's often a large expanse of open sky, water, an empty field, or a large wall, as in the examples below.
4. Find different perspectives.
Taking photos from a unique, unexpected angle can make them more memorable -- it tends to create an illusion of depth or height with the subjects. It also makes the image stand out, since most mobile photos are taken either straight -on or from a bird's eye view.
Try taking a photo directly upward and playing with the sky as negative space, like in the first photo below. Or, you can try taking it at a slight downward angle.


5. Play with reflections.
There's something so idyllic about seeing the sky reflected in a body of water. There's a reason why we love seeing that -- our eyes are drawn to reflections. So look for opportunities to play with them in photos.
There are plenty of out-of-the-box places to find reflections -- puddles, larger bodies of water, mirrors, sunglasses, drinking glasses, and metallic surfaces are just a few.

6. Play around with color blocking.
Isn't it cool when an entire photo is black and white, except for a single object? It turns out that yes, indeed, there are apps for that. One of our favorites is Touch color -- an app that automatically converts a picture to grayscale and lets you fill in the parts you want to colorize.
Color blocking can help to highlight the elements of a photo that you want to stand out, like a plant or something else with a bold hue. It achieves a similar goal as negative space, in that it can help a single subject stand out -- but with color blocking, the photo's other elements remain intact for a cohesive image.


7. Avoid zooming in.
When you take a photo from a distance, it's tempting to zoom in on something specific you're trying to capture. But it's actually better not to zoom in -- doing so can make the photo appear grainy, blurry, or pixelated.

8. Capture small details.
You may have heard the phrase, "It's the little things." Sometimes, that also applies to photos. Close-up images that capture small, intricate, and delicate details can make for really compelling visual content. Keep an eye out for textures and patterns like peeling paint, a gravel road, or a tile tabletop.


9. Set your camera app's exposure manually.
Another mobile camera feature you'll want to set manually is your exposure. Tapping your screen when your phone's camera is on doesn't just refocus the lens on a new subject -- it also automatically adjusts how much light the camera lets in. This, too, won't always look just right. It's best to adjust it by hand.


Useful!
Wow! Very inviting setup and beautiful content!! 😍